Hourglass Quilt Block Calculator
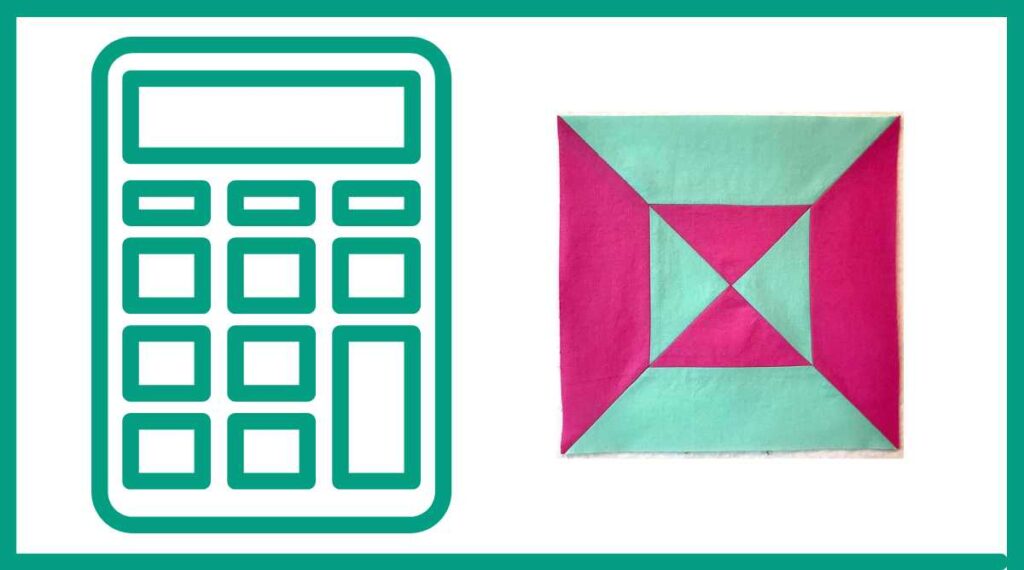
The hourglass block is a classic quilting pattern consisting of four triangles arranged to form an “X” shape. When multiple blocks are combined, they create a visually striking pattern reminiscent of interlocking hourglasses.
Hourglass blocks are versatile and can be used in various quilt designs, from traditional to modern. They can be made with contrasting fabrics to create bold geometric patterns or with subtle color variations for a more nuanced effect. The block’s simplicity makes it an excellent choice for beginners, while its potential for complex arrangements appeals to experienced quilters.
The Importance of Accurate Measurements
Precision is crucial in quilting, especially when working with geometric patterns like the hourglass block. Even small errors in cutting or seam allowances can compound across multiple blocks, leading to misaligned patterns or blocks that don’t fit together properly. This is where the Hourglass Quilt Block Calculator becomes invaluable.
By providing exact measurements based on the desired finished block size, the calculator eliminates guesswork and reduces the risk of errors. This not only saves time but also minimizes fabric waste, which is particularly important when working with expensive or limited-edition fabrics.
How to Use the Hourglass Quilt Block Calculator
Using the Hourglass Quilt Block Calculator is straightforward. Follow these steps to get accurate measurements for your hourglass blocks:
- Locate the input field labeled “Finished Block Size (inches).”
- Enter the desired finished size of your hourglass block in inches. This is the size your block will be after it’s sewn into your quilt top.
- Click the “Calculate” button.
- The calculator will instantly display the results, providing you with all the necessary measurements for creating your hourglass block.
If you need to start over or calculate for a different size, simply click the “Reset” button to clear the input field and results.
Understanding the Calculator Results
After inputting your desired finished block size and clicking “Calculate,” the tool provides several key measurements. Let’s break down each result and its significance in the block-making process:
1. Cut Size for Fabric A and B
These measurements indicate the size of squares you should cut from your chosen fabrics. The calculator adds 1.25 inches to your finished block size to account for seam allowances and trimming. This extra allowance ensures you have enough fabric to work with during the construction and finishing process.
2. Grid Size
The grid size is half of your finished block size. This measurement is useful for understanding the scale of your block and can help with positioning elements within the block if you’re creating a more complex design.
3. Unfinished Block Size
This measurement shows how large your block should be before it’s sewn into the quilt top. It’s typically 0.5 inches larger than the finished size to allow for seam allowances when joining blocks together.
4. Center/Midpoint Measurement
The center measurement is half of your finished block size. This is useful for aligning the triangles in your hourglass block and ensuring the center point is accurate.
5. Trim Block To Size
This final measurement indicates the size to which you should trim your completed block. It’s 0.5 inches larger than the finished size, allowing for seam allowances when joining blocks in your quilt top.
Practical Examples Using the Calculator
To better understand how to apply the calculator’s results, let’s walk through two examples of creating hourglass blocks in different sizes.
Example 1: 6-inch Finished Block
Let’s say you want to create a quilt with 6-inch hourglass blocks. Input 6 into the calculator, and you’ll receive the following results:
- Cut size for Fabric A and B: 7.25 inches
- Grid Size: 3 inches
- Unfinished Block Size: 6.5 inches
- Center/Midpoint Measurement: 3 inches
- Trim Block To: 6.5 inches
To create your block, you would cut two 7.25-inch squares from Fabric A and two from Fabric B. After constructing your block, you would trim it to 6.5 inches square. When sewn into your quilt top with 1/4-inch seam allowances, the finished block will measure 6 inches.
Example 2: 12-inch Finished Block
Now, let’s calculate for a larger 12-inch block. Enter 12 into the calculator to get these results:
- Cut size for Fabric A and B: 13.25 inches
- Grid Size: 6 inches
- Unfinished Block Size: 12.5 inches
- Center/Midpoint Measurement: 6 inches
- Trim Block To: 12.5 inches
For this larger block, you would cut two 13.25-inch squares from each fabric. The center point of your block would be at 6 inches, which is helpful for aligning your pieces. After construction, you would trim the block to 12.5 inches square, resulting in a 12-inch finished block when sewn into your quilt top.
Benefits of Using the Hourglass Quilt Block Calculator
Incorporating the Hourglass Quilt Block Calculator into your quilting process offers several advantages:
- Time-saving: The calculator eliminates the need for manual calculations, allowing you to start cutting and sewing more quickly.
- Accuracy: By providing precise measurements, the calculator helps ensure your blocks will be the correct size and fit together properly in your quilt top.
- Fabric conservation: Accurate cutting measurements help minimize fabric waste, making your quilting more cost-effective and environmentally friendly.
- Flexibility: The calculator can accommodate any finished block size, allowing you to easily scale your hourglass blocks for different projects.
- Confidence boost: For beginners, having exact measurements can increase confidence in tackling more complex quilt designs.
Tips for Success with Hourglass Blocks
While the Hourglass Quilt Block Calculator provides accurate measurements, there are additional steps you can take to ensure success with your hourglass blocks:
- Use a quarter-inch seam allowance: The calculator’s measurements assume a standard quarter-inch seam allowance. Be consistent with your seam allowances to maintain accuracy.
- Press seams open: This helps reduce bulk at the center point of the block and allows for more precise alignment when joining blocks.
- Trim carefully: When trimming your completed block, align the 45-degree line on your ruler with the diagonal seams to ensure your block is square.
- Consider fabric choice: High-contrast fabrics can make the hourglass pattern more striking, while similar tones create a subtler effect.
- Practice with scraps: If you’re new to hourglass blocks, practice with scrap fabric before cutting into your project fabrics.
